
Get started with the Digital Ocean
Hello 👋,
Welcome to the first article in the "Deploying PHP Application on Digital Ocean" series. In this series, I will guide you from creating an account on Digital Ocean to setting up automatic updates.
What is the Digital Ocean?
Digital Ocean is a cloud service provider. It provides various services we require to deploy an application on the cloud, including but not limited to virtual machines, databases, backups, Storage spaces, and Kubernetes.
Get Started!
Okay, so you know what the Digital Ocean is. Let's create an account and get started. You can create an account by going to digitalocean.com. By using the link in this article you will get $200 credits to get started. You will need to fill in your basic contact information and a credit card for billing purposes.
Once your account is created you will be greeted with the dashboard. Now to organize the resources, you can create projects. Let's create one. Click on the New Project button, and enter the details asked, project name and use case of the project.

Creating the Droplet 💧
As we have created the project, we can now create a droplet. You might be thinking what is a droplet? Droplet is a cloud virtual machine offered by Digital Ocean. There are various options you can configure to create the droplet required as per your requirement. For this demo, we will be creating the droplet with the below configuration.
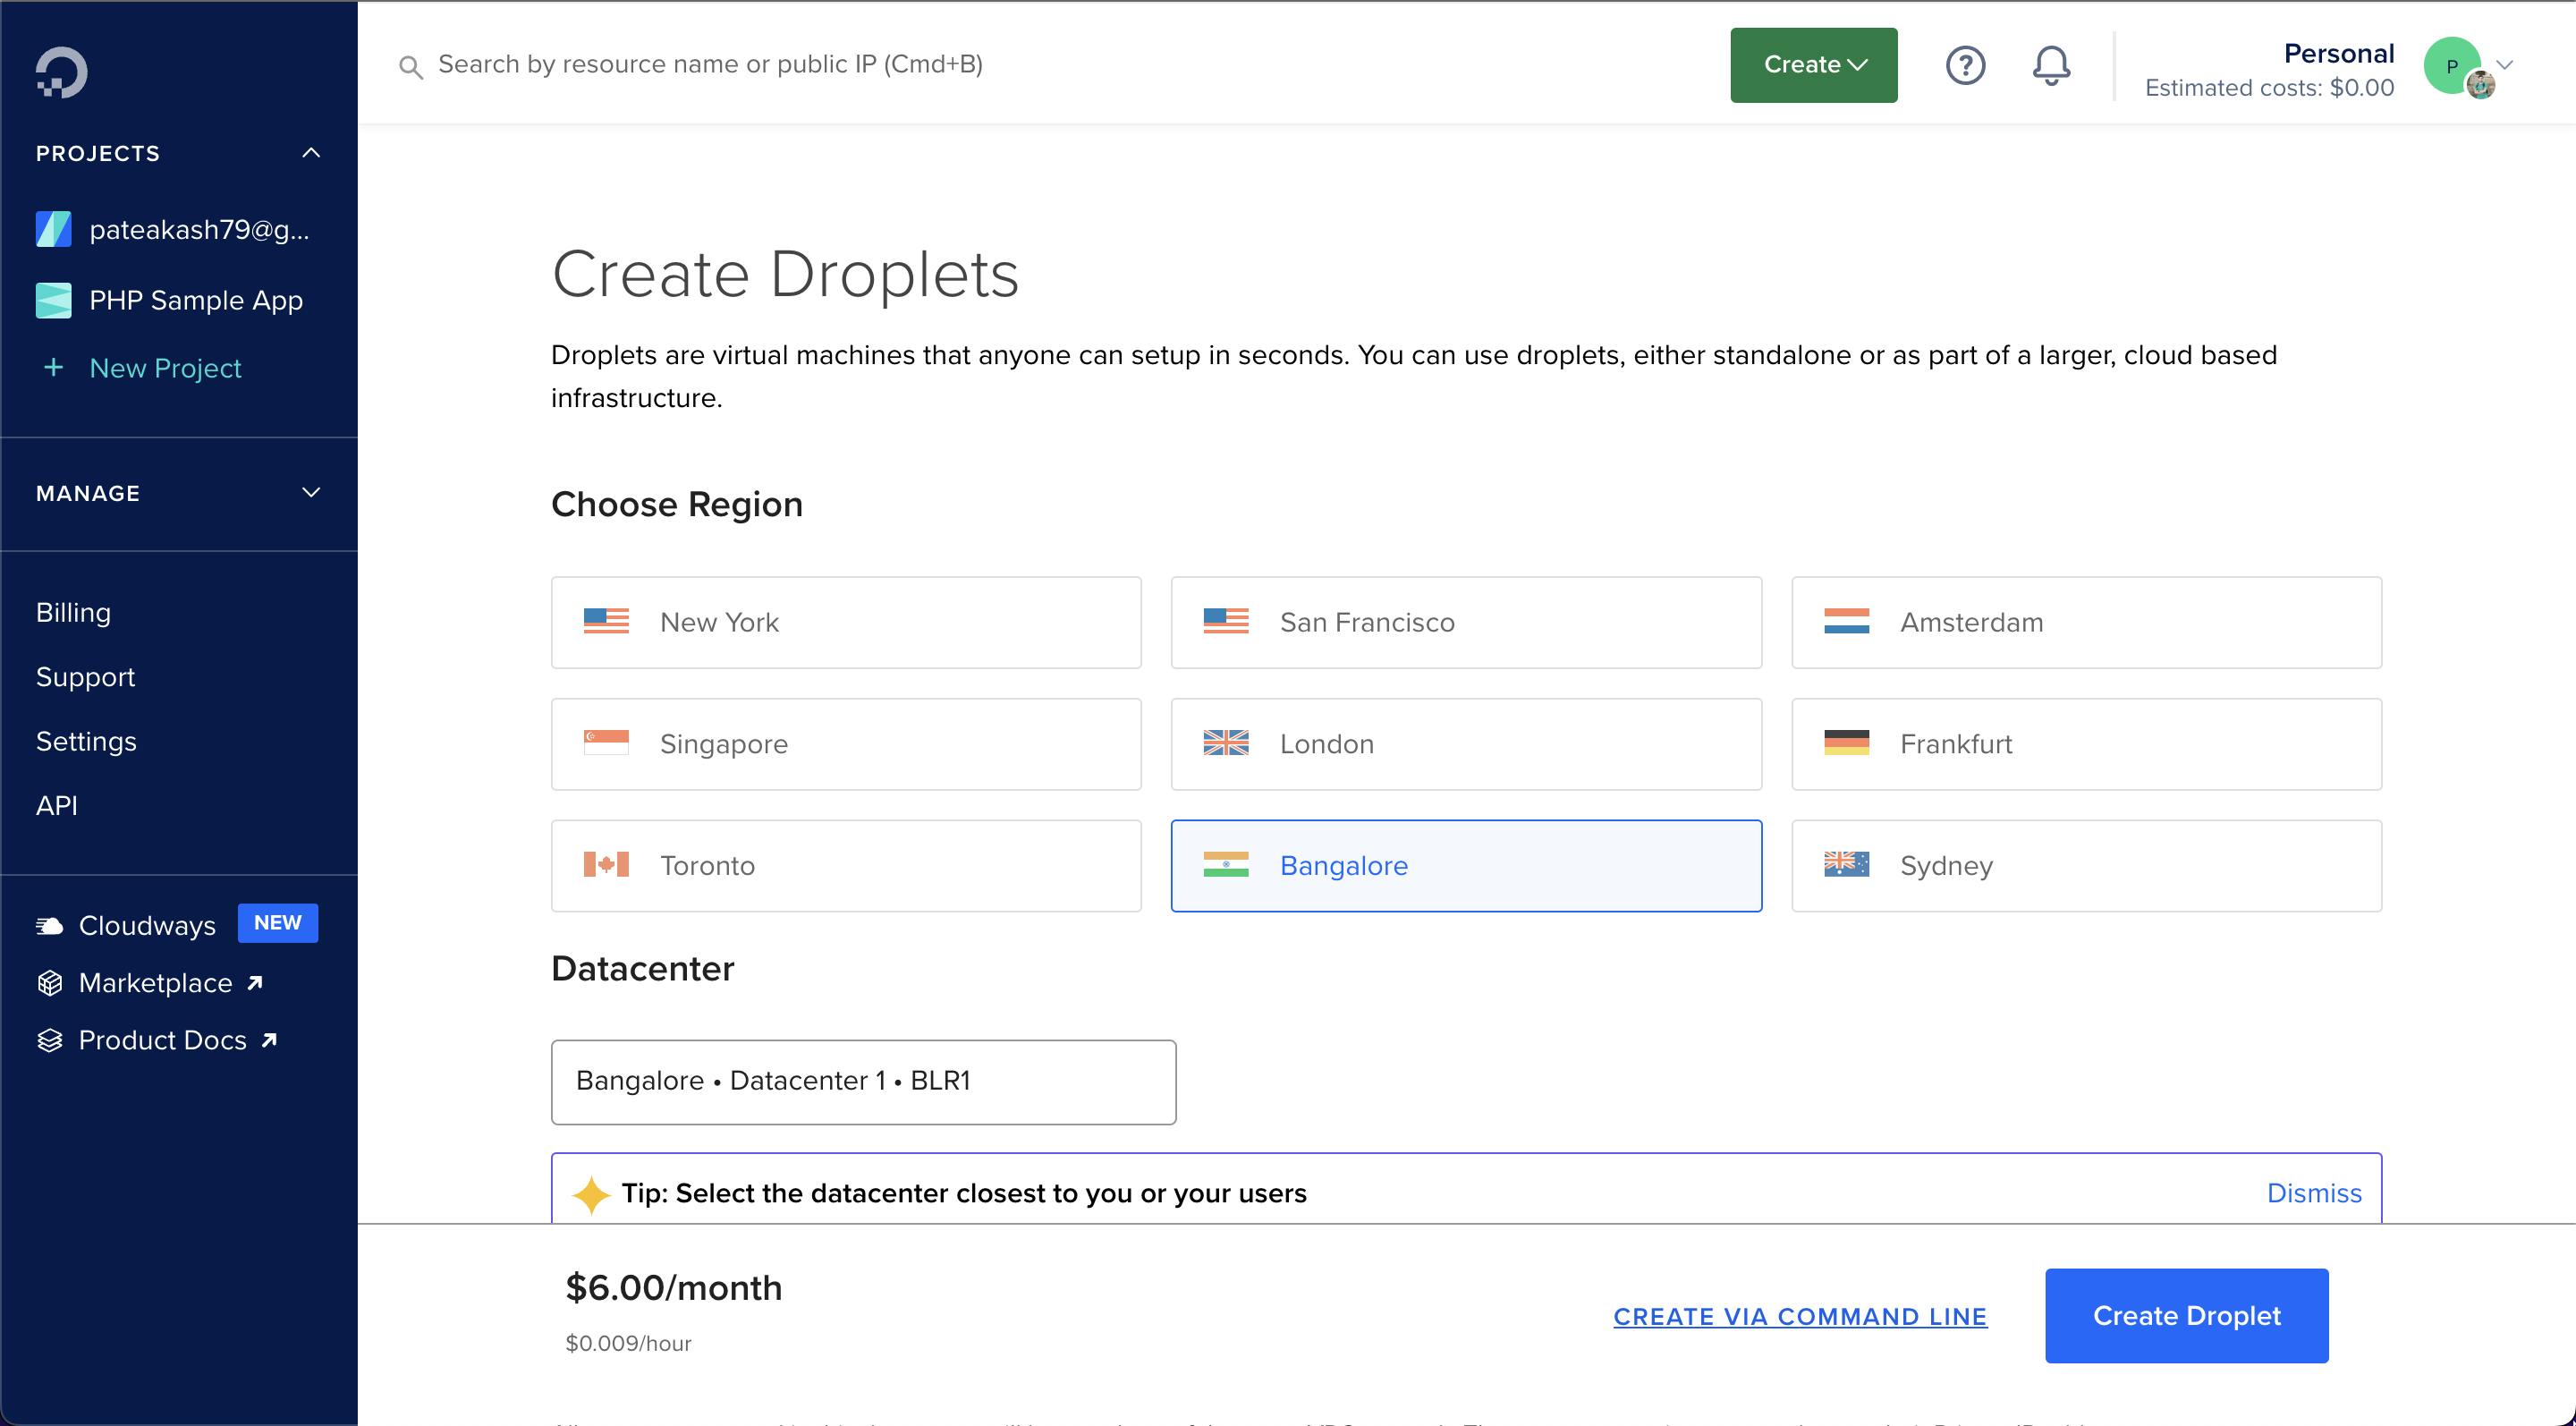
Region - Banglore
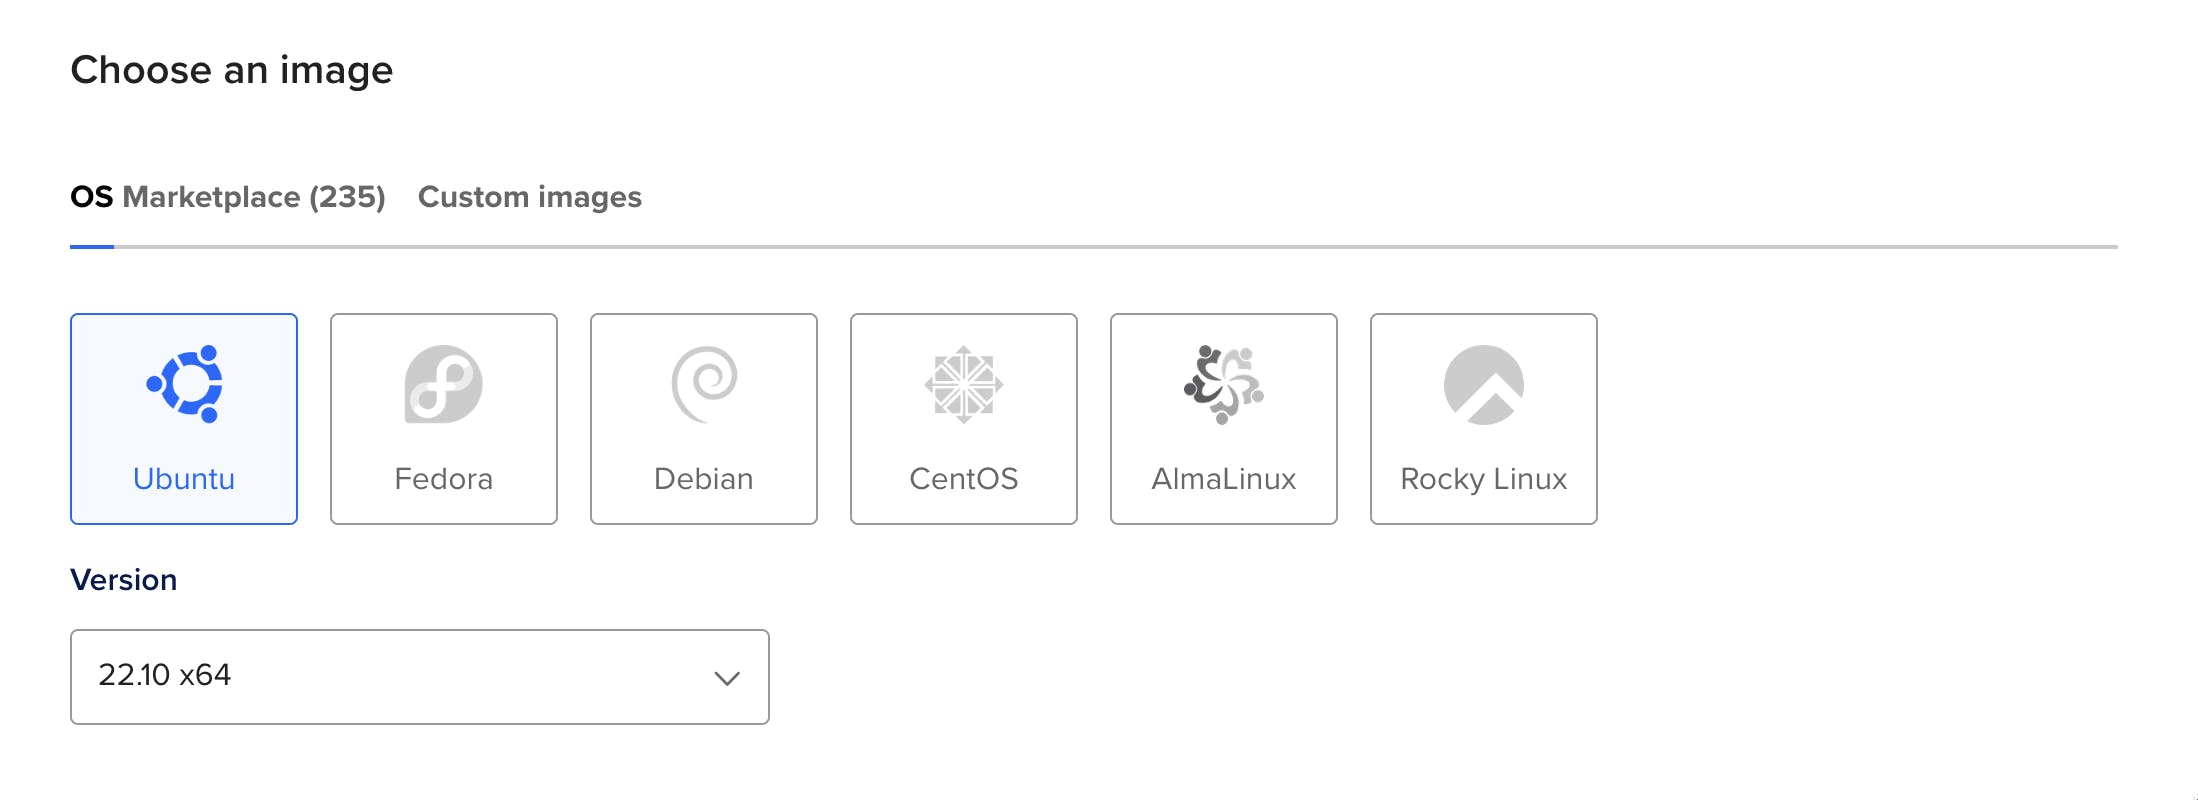
Operating System - Ubuntu 22.10 x64
Droplet Type - Basic
CPU - Regular
Specification - 1GB / 1 vCPU / 25 GB SSD / 1000 GB Bandwidth
You may need to change the region depending on your location. Choose the nearest available location to avoid any latency issues. I will be choosing the basic droplet as this is a demo. I recommend you start with a 2GB ram variant for a production application.
Here are some screenshots of creating the droplet.
Choose the Region (Nearest to your location) I am selecting Banglore.
Choose Operating System - Ubuntu 22.10 x64
Select the droplet type as basic and regular with SSD. I am selecting a 1GB RAM variant for the demo. You may choose the 2GB RAM variant if you want to deploy a production application.

Select the Authentication method. There are two methods available by which you can connect to the droplet. SSH Key and password, In this article I will be using the password. Type a strong password for your root user. Do remember to save the password because.

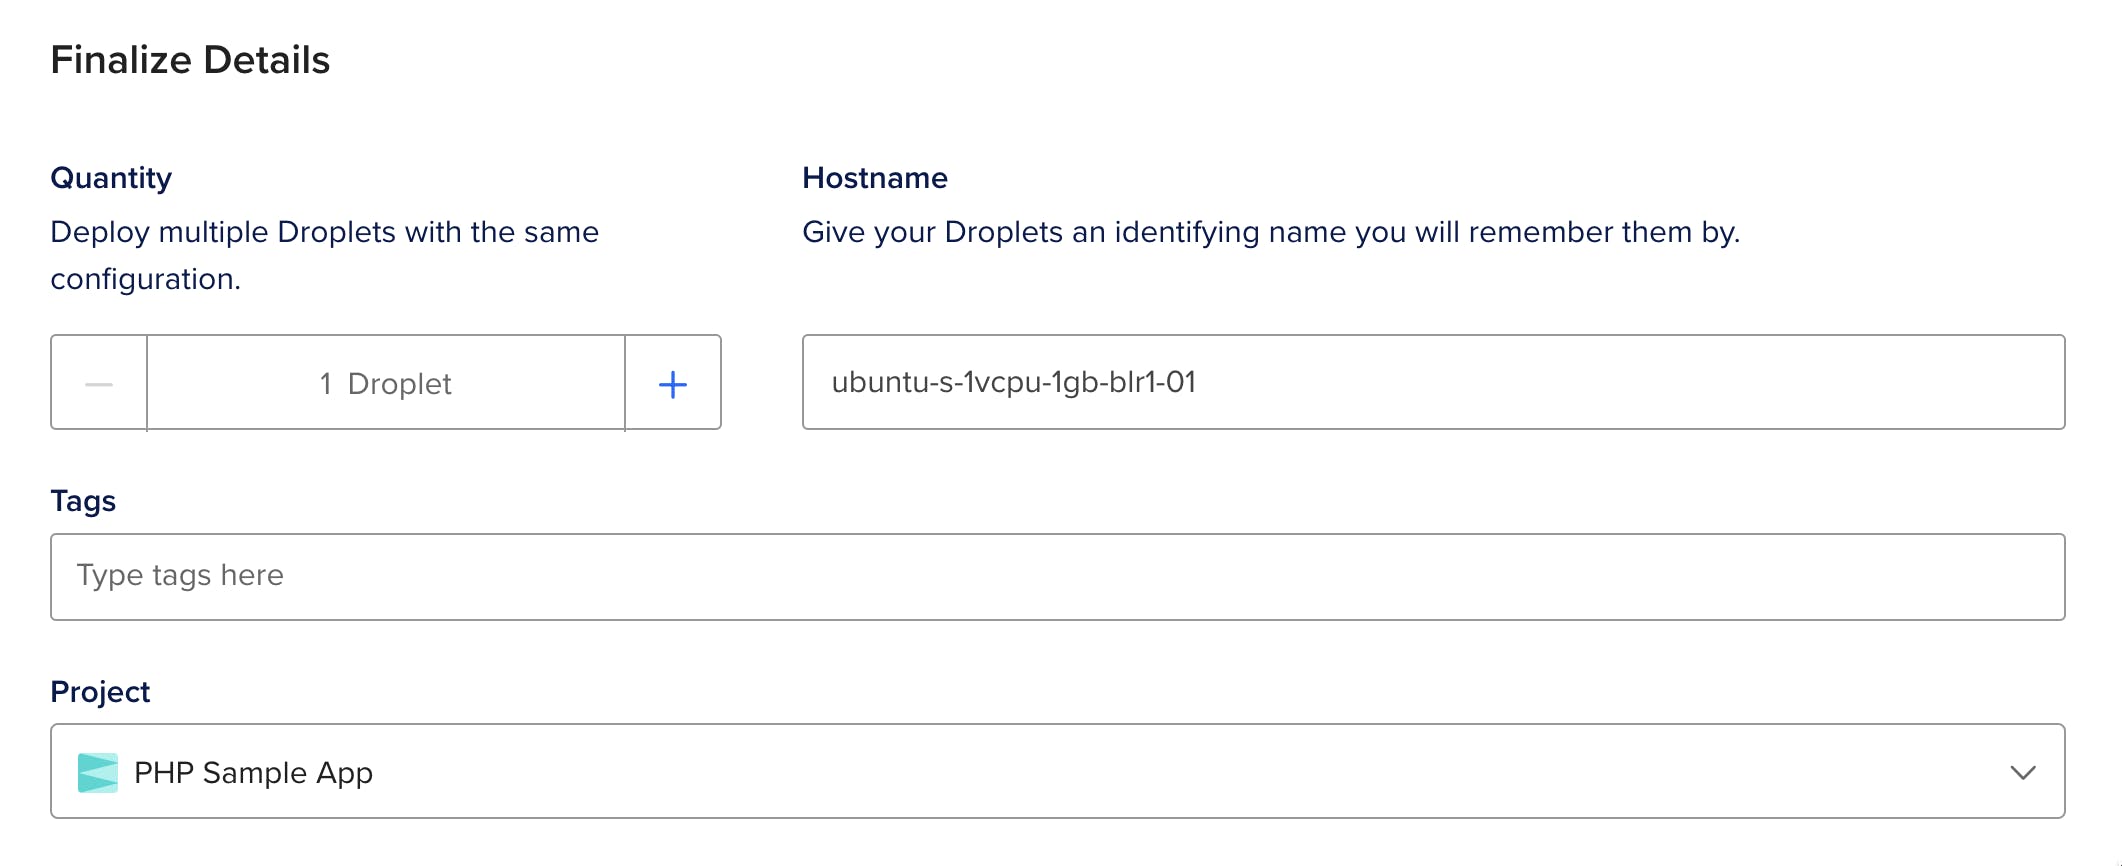
In the final step choose a hostname, mostly default hostname is good enough. If you want to choose a different name you may proceed. I will go with the default one. Select your project name. Mine is "PHP Simple App".
Now click on Create Droplet. You will be greeted with the below screen once Digital Ocean finishes creating a Droplet.
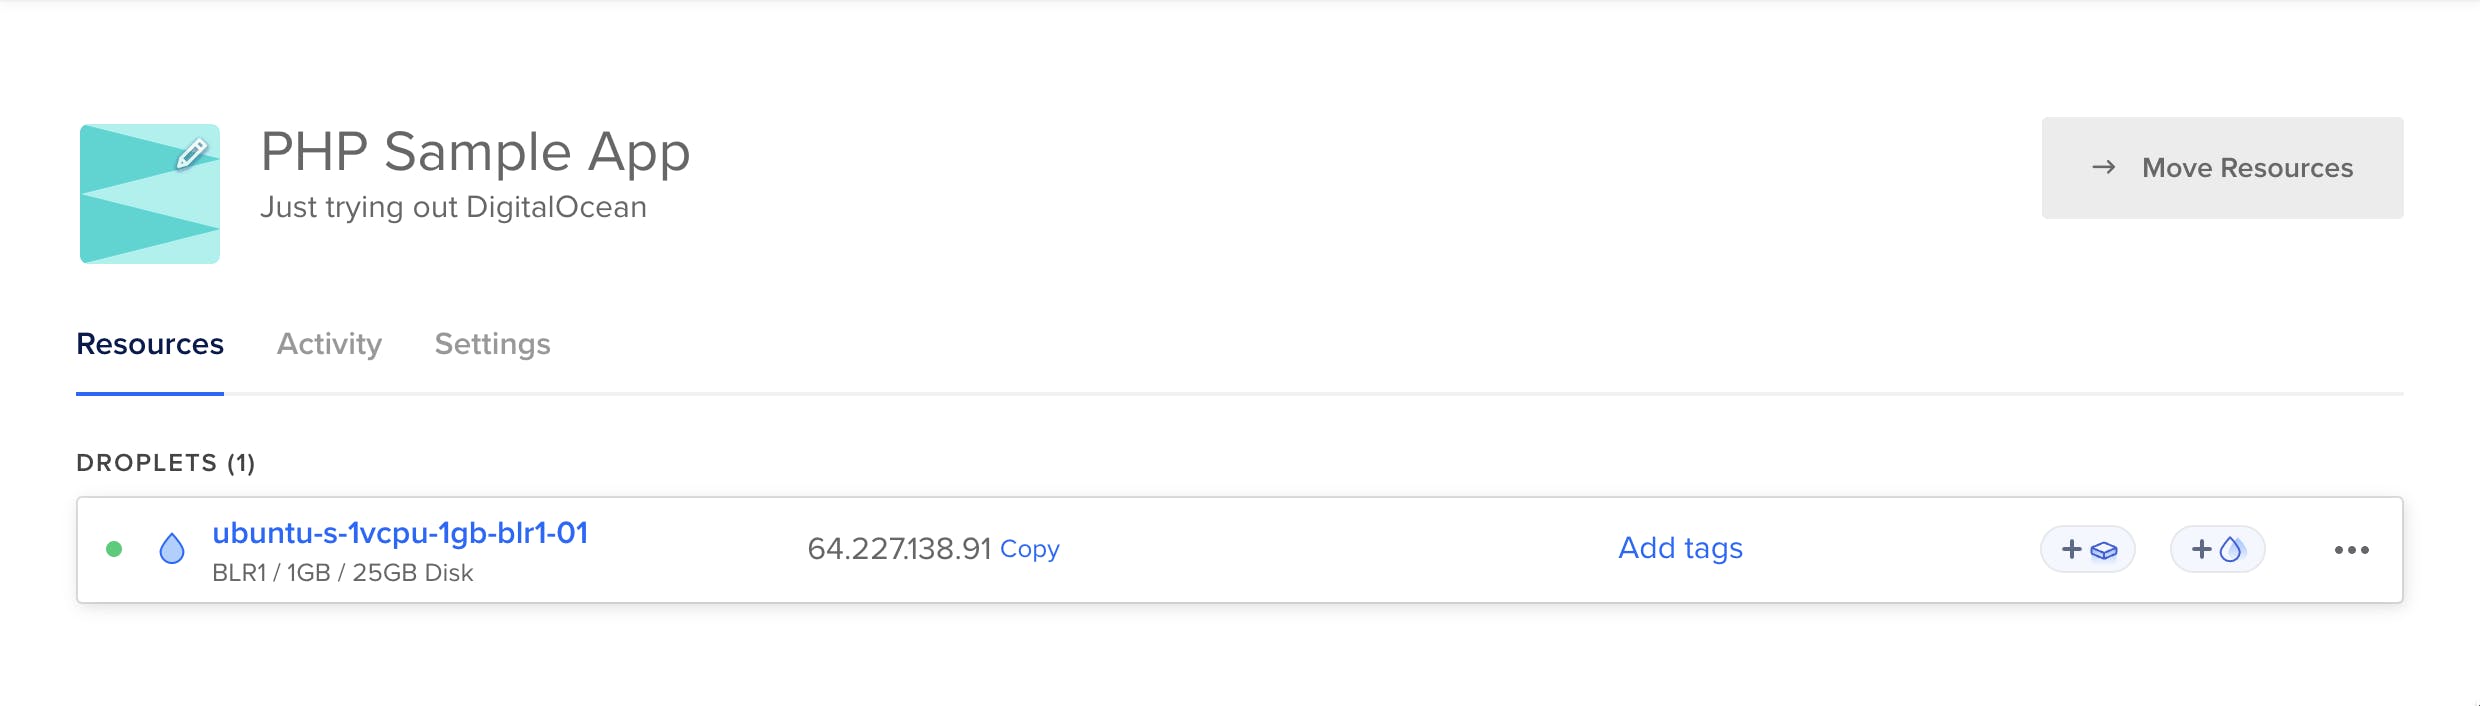
Congratulations! 🎉
You have successfully created the droplet. In the next article, I will discuss how we can log in on our newly created droplet. and we will start installing the required applications and configuring them.
Thanks for Reading. ❤️
Do share your feedback in the comments and react to the article.